read-district
Read District
This website provide book reviews and recommendation. You can write your personal review and read review of other users. Here you can find a selection of great book you’ll love.
Contents
- UX (User Experience)
- Design Choices
- Technologies Used
- Features
- Project Management
- Version Control
- Testing
- Deployment
- Credits
UX
UX (User Experience)
Project Goals
The goal of this project is to build a website, using backend knowledge, to allows users to read book reviews created by other registered users and write book reviews.
The features on the website will:
- Display a list of book reviews containing book information.
- Display all the details of each book and their review.
- Visitors can see the reviews and can register a user account.
- A registered user create their own book reviews and edit them.
I achieve this by:
- Providing registration functionality. A Registration form with username and password allow the user to create an account.
- Providing log in functionality. Users can log in to their account.
- With backend technologies the website display and grant access to the data stored into the MongoDB database.
- Enabling users who are logged in to create, edit or delete their own book reviews.
User Goals
- Read book reviews created by other users.
- Search book reviews.
- Create book reviews, share a personal point of view with other readers.
- Update apersonal book review.
- Delete a book review.
User Stories
New Site Visitor
- As a user, I want to see a navigation bar always visible, that helps me to navigate to the site pages.
- As a user, I want to see a complete list of the available book reviews.
- As a user, I want to interact with the book cards to see more info about the book reviews displayed.
- As a user, I want to be able to search for book reviews.
- As a user, I want to register to the site with a personal username and password.
- As a user, I want to be able to log in to the site.
- As a user, I can contact the site owner(s) using GitHub.
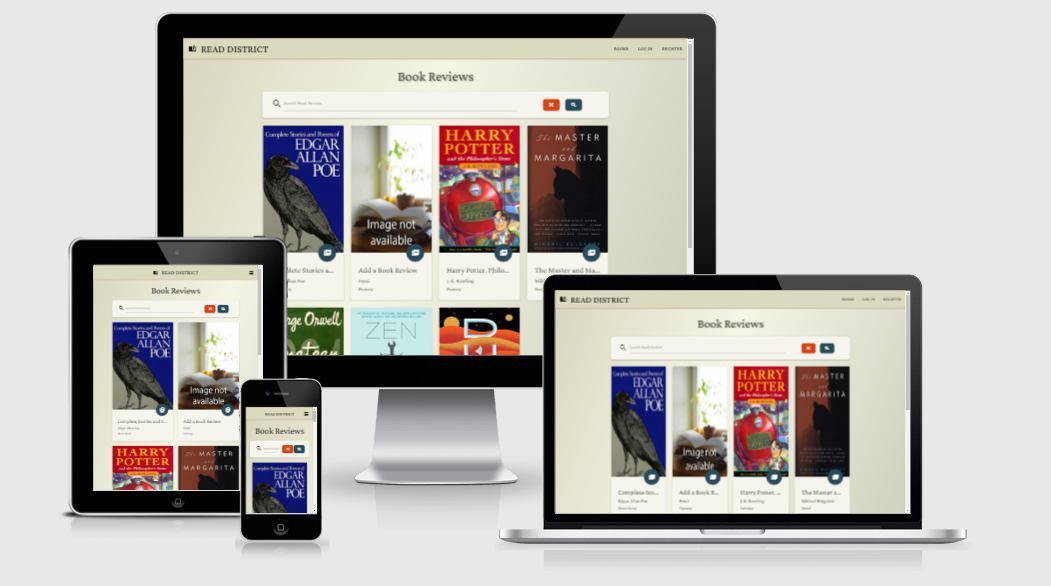
- As a user, I want a responsive app on mobile devices as well as desktop screen.
Returning Site Visitor
- As a user, I want to see my user account profile page.
- As a user, I want to create, edit or delete my own book reviews.
Site Owner Goals
- As a site owner, I want to create an interactive website that make use database and backend features as coding portfolio.
- As a site owner, I want to create a website for the user that want to share his /her personal opinions about books.
- As a site owner, I want to create a website easy to use, safe for the user and his/her data.
Design Choices
Fonts
The main font I’ve chosen is Crimson Pro,
is an antique-classic looking font that fit well with all type of books. It is sober and elegant.
Is easy to read even using small font sizes.
Colours
I’ve chosen for the backbround a color similar to the old paper, and a lighter tone for the serach bar and the cards. Instead of a white background I wanted a warmer and relaxing color for the eyes. I used strong accent of colors for text messages and buttons, because their function is to attract the attention.
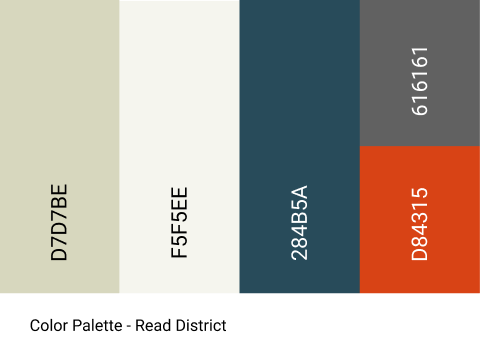
- (D7D7BE) - Navbar and a linear gradient for the bachground - black text
- (F5F5EE) - Card contents and search bar background - black text
- (284B5A) - Flash messages, primary color for the buttons and footer - white text
- (D84315) - Buttons cancel/delete - white text
- (616161) - Button cancel in the modal window - white text
Wireframes
I designed the mock-ups of the website using Figma.
I designed the pages having in mind cards and forms from previous projects. This design works well with responsive behaviours. The final result is slightly different, mostly improved by icons and organic repetition in the style.
Technologies Used
Languages
- HTML5
- Used as the main markup language for the website content.
- CSS3
- Used to style the individual webpages.
- JavaScript
- Used to create the interactive functionality of the website
- Python3
- Used to create the main application functionality
Database
- MongoDB Atlas
- Cloud based document-oriented database used to store the backend data.
Libraries
- MaterializeCSS
- Used to design a mobile-first responsive website layout.
- Flask
- Python web framework
- Werkzeug
- A comprehensive WSGI web application library installed with Flask
- PyMongo
- PyMongo is a Python tool for working with MongoDB
- Flask-Pymongo
- Flask-PyMongo bridges the gap between Flask and PyMongo
- DNSPython
- DNS toolkit for Python
- itsdangerous
- Python utility for hash-based message authentication installed with Flask(HMAC, SHA-512)
- jQuery
- Used for the initialisation of the Materialize CSS components functionality.
- Jinja
- Templating language for Python.
Tools
- Git
- Git was used for version control by utilizing the Gitpod terminal to commit to Git and push to GitHub.
- GitHub
- Used to store, host and deploy the project files and source code after being pushed from Git.
- Gitpod
- An online IDE linked to the GitHub repository used for the majority of the code development.
- Visual Studio Code
- Visual Studio Code is a freeware source-code editor made by Microsoft.
- PIP
- Package installer for Python. Use pip to install packages from the Python Package Index and other indexes.
- Google Material Icons
- Used for icons to enhance headings and add emphasis to text.
- Google fonts
- Used for the website fonts.
- Color Gradient Generator
- An online tool used to choose the website colour scheme.
- Am I Responsive?
- Snapshot of the responsive breakpoints of the website to visualize the look on mobile, tablet and desktop screens.
- Adobe Illustrator
- Adobe Illustrator is a vector graphics editor and design program developed by Adobe Inc.
- Adobe Photoshop
- Adobe Photoshop is a raster graphics editor developed by Adobe Inc.
Features
Existing Features
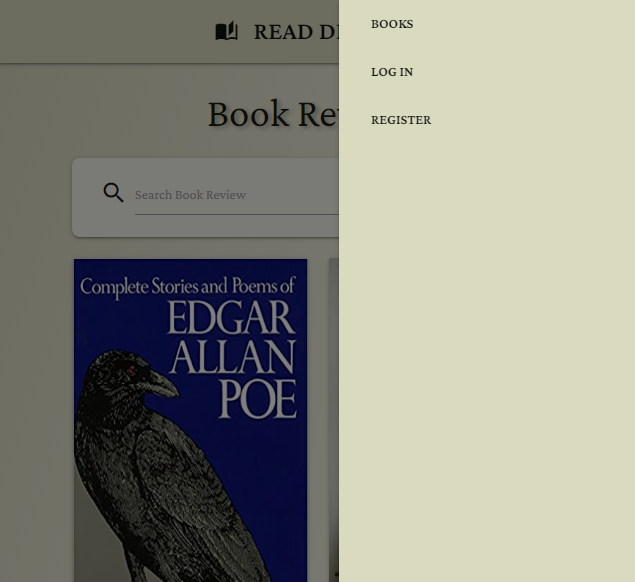
- Navbar
- Book Icon, and Name logo.
-
The MaterializeCSS Navbar is responsive. For small and medium screen size there is a burger icon that opens the lateral menu.
- For visitors to the site who are not logged in, is available the list of all the books reviewed and the links for these pages:
- Books (search form)
- Book Page (only see the detail and review of the book)
- Log In (form -username -password)
- Register (form -username -password -email)
- Books (search form)
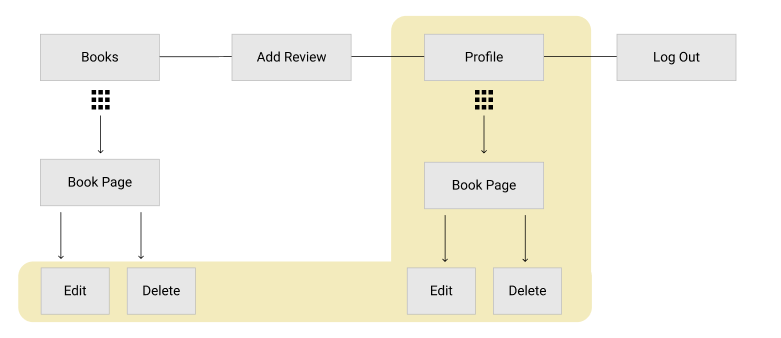
- For users who are logged in:
- Books (search)
- Add Review (form -details of the book, Image URL and review)
- Profile (list of review written by the user)
- Book Page (Edit/Delete review)
- Log Out
- Python code the behaviour of the page. By checking
if 'user' in sessionthe user can or cannot see part of the site and functionality. Security is ensured. - Jinja2 templating framework for Python is used to create the site’s front-end dynamic content.
- If the cover image of the book is broken a
'onerror' eventhandle the error displaying a dummy image. -
When you click the Delete button a modal window ask you to confirm or cancel the action.
- Footer
- Show my name, and that is a link for the GitHub page of this repository.
Additional Site features
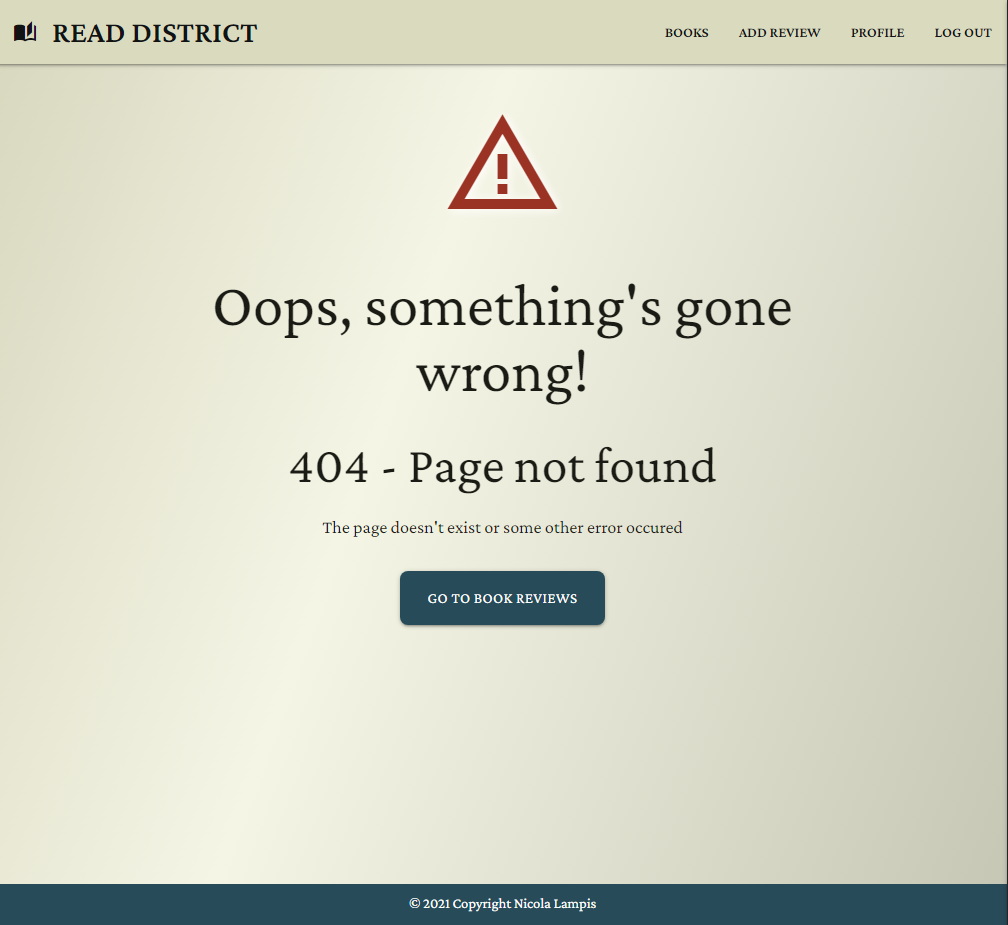
-
Error Handlers. Flask have a function that returns a response when a type of error is raised, in this way we can redirect the user to an Error Page, that inform about the type of error, what to do or where to go. In the error page is always present a button that redirect to the book reviews page.
- HTTP 404 Error
- HTTP 500 Error
- HTTP 503 Error
Future Features
- User comments - add a section for users interaction.
- Email - message notification of new messages.
- Upload image as a file - upload the cover image of a book.
- Superuser functionality over the site.
Backend Design
- The app is created using Python3 and a Flask framework to render the HTML pages.
- The site is deployed via a Heroku app linked to a GitHub repository.
- The dynamic content is served utilising a MongoDB document based database.
Site Construction
Topology
-
User Logged Out, Visitor
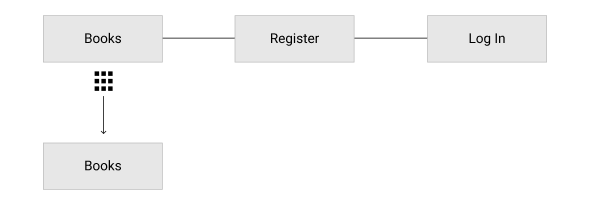
-
User Logged In
Responsive Navbar
-
Jinja2 template conditions remove menu items based on the user logged in/out.
- Log Out Navbar at desktop screen sizes

-
Log In Navbar at desktop screen sizes

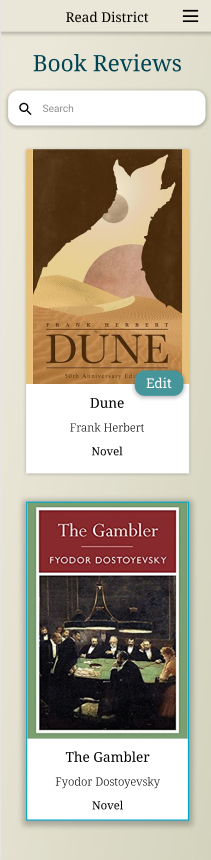
- Responsive Navbar at small screen sizes
- Responsive Navbar at small screen sizes, lateral menu collapsed
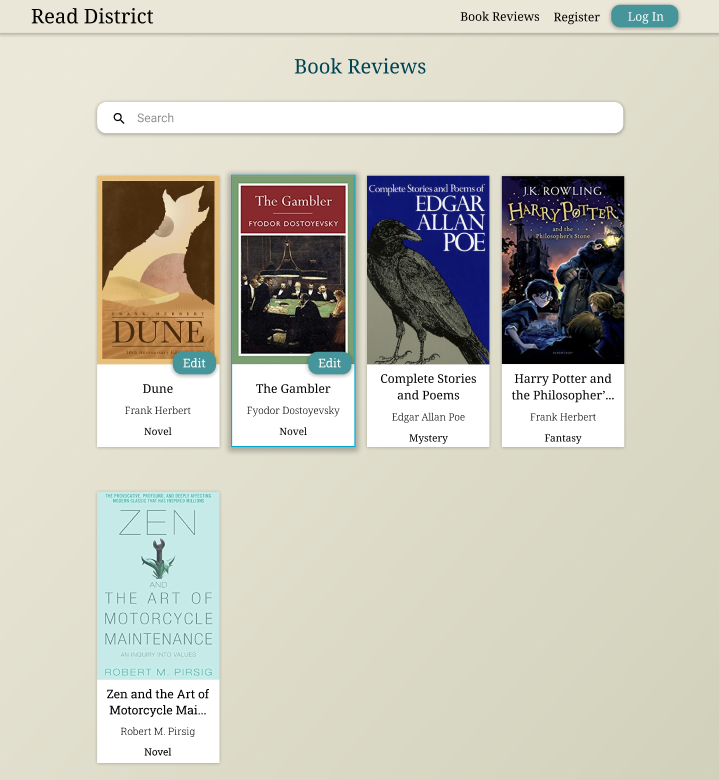
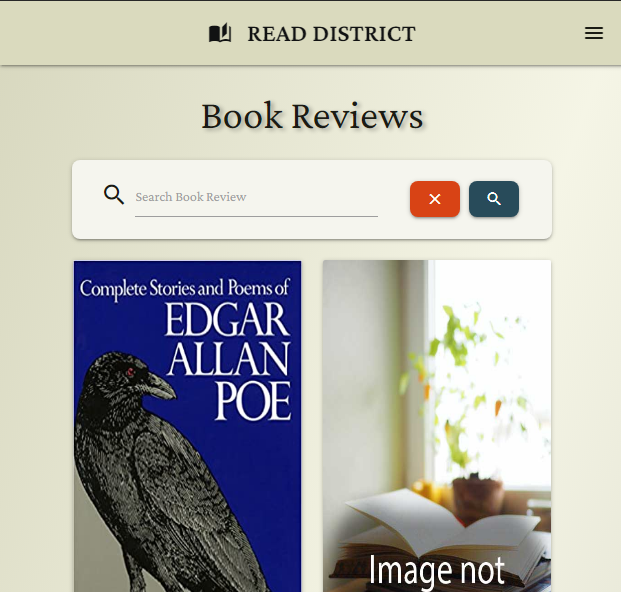
Page of the Book Reviews
-
The book reviews page render all the cards that contain books reviewed. Available for all visitors.
- Each card contains a circular button which opens the book page with more details and the review itself.
- When the user is the writer of the book review, another button suggest the ability to edit.
- The search bar allows the user to search through the reviews. I created a text index that allow as parameter of the search the title or author of the book.
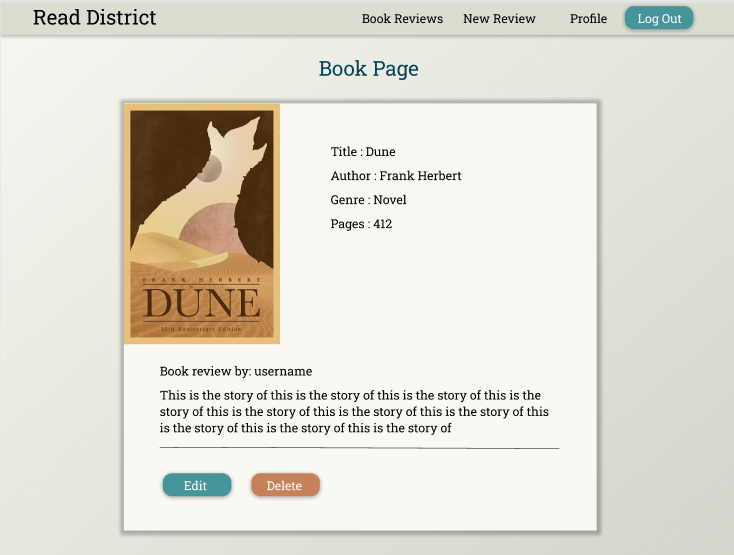
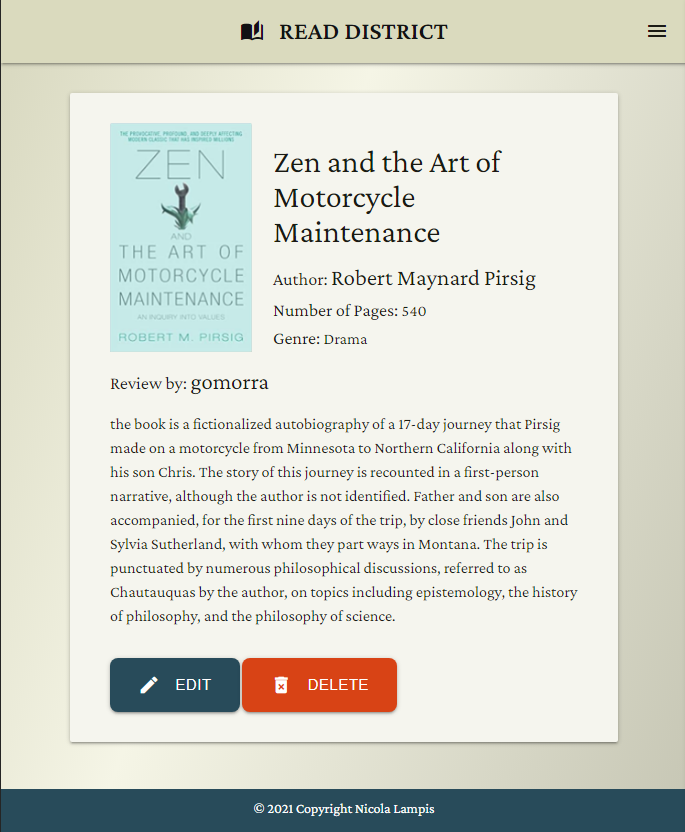
Book Page
- The book page render the book review plus book cover image, title, author, number of pages and genre. Available for all visitors.
- Only for the user writer of the book are visible the Edit and Delete buttons.
- Edit button redirect to the Edit Page.
- Delete button opens a confirmation modal window for the deletion.
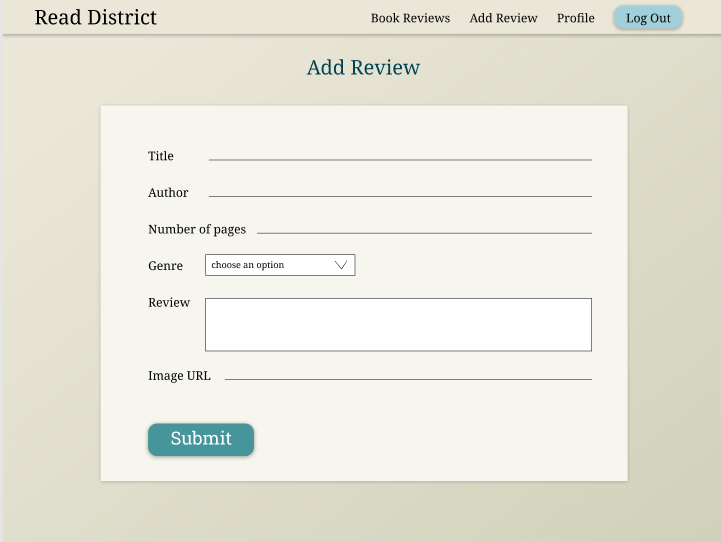
Add Review Page
- The Add Review page consist in a form to complete and a submit button. Available only for registered user logged in.
- the submission of the form create a new review item into the database.
Edit Review Page
- Only for the user writer of the book have the permission to edit the review.
- The code search for the data of the book and pre-fills the form inputs with the current values, so that you can see exactly what you have to change.
- Cancel button, redirect to the book reviews.
- Submit Review button, submit all the changes.

Register Page
- A new users can create an account filling the form.
- New usernames will checked in order to be unique in the db collection.
- Passwords are hashed before saving to the database (SHA256 Encryption with python)
Login Page
- Validation of both username and password, placed into users collection.
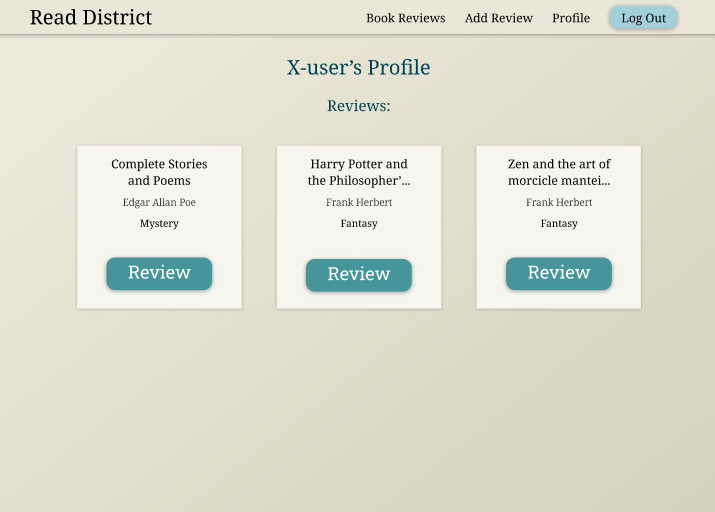
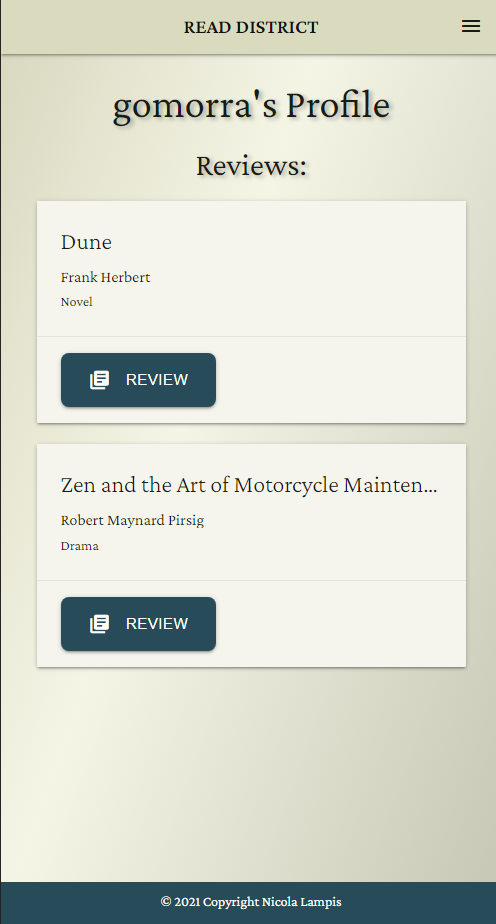
Profile Page
- The profile page displays the user’s name.
- If any, Jinja will display a section that contain cards of the book reviews written by the user.
- The review button redirect the user to the book page.
CRUD Functionality
| Site Page | Create | Read | Update | Delete |
|---|---|---|---|---|
| Book Review | All book reviews | |||
| Book Page | Single book review | Delete single review | ||
| Add Review | Created book review | |||
| Edit Review | Single book review | Update single book review | ||
| Register | Add new user | |||
| Log In | User details | |||
| Profile | User details |
User Messages
- Flask flash message are used to feedback user actions:
- Success
- Log In
- Log Out
- Register
- Add Review
- Edite Review
-
Delete Review
- Permission Denied
- Log In - username or password incorrect
- Add Review - no session user
- Edite Review - no session user
- Delete Review - no session user
Defensive Programming
- In order to maintain the site security, I used a defensive programming to prevent “brute force” loading of restricted pages.
- This means that if you are not logged in, you are not able to open or see certain pages.
- Using session cookies to validate whether a user is logged in or not.
- Using session cookies to validate a specific user data over others data.
- Functions in Python checks conditional statement and exception in order to handle a variety of wrong events.
- examples of this include preventing site visitors, who aren’t logged in, from just entering a page URL to bypass the login process. This type of exception redirects the user to the login page with a warning flash message.
- This means that if you are not logged in, you are not able to open or see certain pages.
Database Design
users collection
| Field Description | Collection Key | Data type | Default Value |
|---|---|---|---|
| Unique ID | _id | ObjectId | |
| Username | username | string | |
| Password Hashed | password | string | |
| string |
reviews collection
| Field Description | Collection Key | Data type | Default Value |
|---|---|---|---|
| Unique ID | _id | ObjectId | |
| Book Title | title | String | |
| Book Author | author | String | |
| Number of Pages | number_pages | integer | |
| Genre Category | genre | string | |
| Book Review Text | review | string | |
| Book Cover Image URL | image_url | string | |
| Created By: User | create_by | string | username |
Project Management
- GitHub Projects helps to manage the planning of the website.
Version Control
- Version control allows you to keep track of your work and helps you to easily explore the changes you have made.
- This repository is hosted by Github and the workspace is managed with Gitpod.
- Branch Master is the dafault branch in Git.
Gitpod Workspaces
- In your GitHub repository click on the Gitpod button to start the workspace.
- Gitpod loads the online IDE editor window, you are ready to code.
Update Repository
- To update the repository inside GitHub, use these commands in the Gitpod terminal
- git add -A
- git commit -m “your commit message”
- git push (default to the master branch)
Testing
- Testing information can be found in a separate testing.md file.
Deployment
The website was developed using Git pushed to GitHub, which hosts the repository.
How to run this project locally
To run this project locally you will need the following tools installed on your system:
- Python 3.6 or higher and PIP
- An IDE such as Visual Studio Code
- Git
- An account at MongoDB Atlas
Instruction
- Navigate to the GitHub repository https://github.com/NicolaLampis/read-district .
- click the Code button, then “download zip” to have a copy stored in you machine.
- Unzip the repository into the chosen folder, open with your favourite IDE.
- click the Code button, copy the URL.
- Having Git installed on your system, you can clone the repository with the following command.
git clone https://github.com/NicolaLampis/read-district
- Having Git installed on your system, you can clone the repository with the following command.
- click the Code button, then “download zip” to have a copy stored in you machine.
-
If possible open a terminal session in the unzip folder or cd to the correct location.
- Create a virtual environment with the command:
python -m .venv venvNOTE: Your Python command may differ, such as python3 or py
- Activate the .venv with the command:
.venv\Scripts\activateThis command may differ depending on your operating system, please check the Python Documentation on virtual environments for further instructions.
- Install all required modules with the command:
pip -r requirements.txt. - Create the
env.pyfile.- In order to set the default environment variables env.py file should contain at least the following information: ``` import os
os.environ.setdefault(“IP”, “0.0.0.0”) os.environ.setdefault(“PORT”, “5000”) os.environ.setdefault(“SECRET_KEY”, “YOUR_OWN_VALUE”) os.environ.setdefault(“MONGO_URI”, “YOUR_OWN_VALUE”) os.environ.setdefault(“MONGO_DBNAME”, “YOUR_OWN_VALUE”)
- Replace "YOUR_OWN_VALUE" with the correct values.
- ***Important:*** Add the `env.py` file to your `.gitignore` file before pushing your files to any public git repository.
- A .gitignore file specifies intentionally untracked files that Git should ignore. In this way your sensible data remain secret and invisible.

7. You can run the application with the command:
python app.py ```
- You can visit the website at http://127.0.0.1:5000
Create the database in MongoDB
- In your MongoDB cluster, create a new database called
books_db - Create the following collections within the new database:
Deploy to Heroku
-
Create a requirements.txt file using the terminal command
pip freeze > requirements.txt. -
Create a Procfile with the terminal command
echo web: python app.py > Procfile. -
Perform commands
git addandgit commitfor both requirements and Procfile, ,thengit pushthe project to GitHub. -
Create a new app on the Heroku website by clicking the “New” button in your dashboard. Give it a name and set the nearest region to you.
-
From the heroku dashboard, click on “Deploy” > “Deployment method” and select GitHub.
-
Link the heroku app to the correct GitHub repository.
-
In the heroku dashboard, click on “Settings” > “Reveal Config Vars”. Insert the following KEY and VALUE:
| Key | Value |
|---|---|
| IP | 0.0.0.0 |
| PORT | 5000 |
| SECRET_KEY | put_your_personal_secret_key |
| MONGO_URI | mongodb+srv://root: your_root_password @myfirstcluster.iixj3.mongodb.net/ your_database_name ?retryWrites=true&w=majority |
| MONGO_DBNAME | put_the_database_name |
-
Select deploy branch Master.
-
Click Open App in Heroku to launch the App in a new browser window.
Credits
Images
- The cover images of the books are stored in the database as URL and are dynamically rendered in the cards.
- The source of the book images are Wikipedia and Amazon.com
- Dummy image book is hosted in unsplash.com by the artis Fang-Wei Lin
Inspiration
- Part of the conten for the reviews came from Wikipedia and Amazon.com
Acknowledgements
- Nicola Lampis Milestone projects 1/2
- Code Institute Course material, practice code challenges (Task Manager and Thorin Flask apps).
- Simon Vardy for project inspiration and README.md format ideas.
- A Greaves for README.md content and format ideas.
- Rahul Nanwani code inspiration on how to handle broken images.
- Flask Documentation lots of resourceful content about templates, staic files and error handlers.
- Python.org Python VENV virtual environments documentation
- W3Schools amazing source of knowledge and tutorials.
- Materialize how to use components, form and javascript functionality
- Gradient generator free tool that lets you create a gradient background for websites.